Exercise 2 :: Interface Elements and Properties

In this exercise we will investigate some interface elements available in Visual Basic. We will also begin to learn how to set the various properties of these interface elements.

Interface elements (Controls)

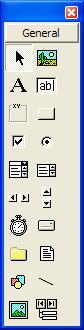
An interface element is anything that can be added to a form. In this workshop, they will often be referred to as controls. This is the general toolabr:

toolbar

Looking at the general toolbar you will see icons for each of the interface elements available. We will begin to use these a bit later in this exercise.

Properties

Each interface element has its own properties. These properties define how it looks, how it behaves and how the user can interact with it.

Task 1 :: Hello World Form

In this task, we use the properties of our form to change the string in the title bar.

  1. Open the project you created in Exercise 1. If you have forgotten how, re-read Exercise1/Task2.
  2. Select the form. Do this by clicking anywhere within the grey region of Form1.
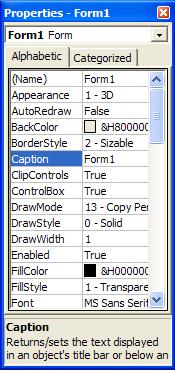
  3. Take a look at the properties pane on the right-hand side of the screen:

    properties box

  4. Each item on the left is the name of a property of the form. Each item on the right is the corresponding value for that property. For example, the "Caption" property has value "Form1".
  5. The "Caption" property is the one that defines the text in the title bar. Click anywhere in the area that contains the value "Form1" next to the name "Caption".
  6. You are now able to edit this text. Change it to "Hello World".

    ----------->

  7. Press the run button to run your program. If you have forgotten where the run button is, re-read Exercise 1/Task1.
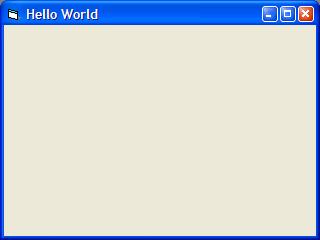
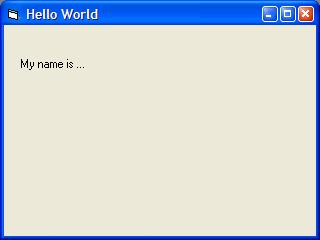
  8. You should see the following program:

    hello

Task 2 :: Adding a control

In this task, we add a control to our form. We also modify its properties.

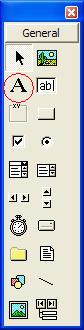
  1. Click on the label button in the toolbar.

    label button

  2. Click and drag somewhere in your form to create the label
  3. Ensure this label is selected (it should already be selected, if not then click in it).
  4. Modify the "Caption" property to be your name, rather than "Label1".
  5. Now run your new program. Your program should look something like this:

    your name

Other controls

The toolbar contains a number of other buttons. To see what controls they correspond to, hold your mouse over the button. After a short while a little window should pop up with a little description of that control.

Task 3 :: Further controls

In this task, we add a number of controls that are available in the toolbar. The aim of this is to make us aware of the interface elements we have available to us in creating our programs in Visual Basic.

  1. Take a look at the following program

    further controls

    To open the program, click on the link. You should be asked if you want to open or save the file you are downloading. Choose to open the program, it should run on your computer directly.
  2. This program implements one version of each of the controls available in the toolbar.
  3. Try to turn your form into the form you see in this example program.
  4. This will involve adding one of each of the controls and changing one of their properties. In most cases, it is the "Caption" property, but it may be another. For some controls, you will not need to add anything as they do not show up in the example program. For example, you cannot see any timer control, so you do not need to add one.
  5. If you are getting stuck on what property to change, try the following exercise to "cheat" from the example program.
    1. Open the example program's project which can be found here. To open this project, you will need to create a copy on your own computer by saving it to your own drive. Firstly, you need to make a directory for this project. To save the project, follow the following steps for all the files you find at the linked location.

      To save a file, right click on its name and choose "Save Target As...". Then save it in the new directory you have created specifically for this project (remember all projects should be in their own directories).

      To open the project, double click on the .vbp file.
    2. You should be presented with the form you are trying to create with all its controls. If you are not, then you need to navigate to it in the project browser (which is on the right hand side of the IDE). Expand the forms list and then double click on the form you want to see.
    3. Highlight a control you are having trouble with
    4. Look to the properties box and find the property name that corresponds to the value you are trying to replicate.
    5. Now return to your own project and set this property.
  6. Run this program.

Creating a stand-alone executable

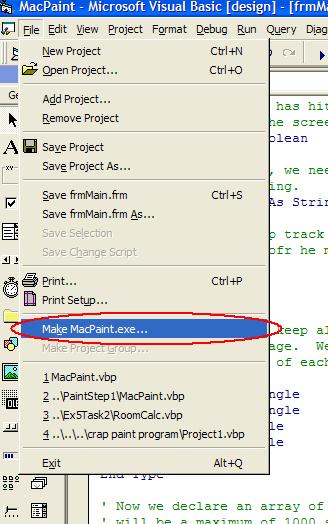
It is possible to compile your VB programs to an executable that can be run without the VB IDE. This should be the final step in creating your program. Stand-alone executables will run much faster than the equivalent program in the VB IDE. The following screenshot indicates the menu option that creates stand-alone executables.

make executable

However, for the small programs we will be writing you will not notice any difference. For this reason we will work entirely within the VB IDE in this workshop. We will not be making stand-alone executables in this workshop.

Warning!

VB is a really great language, but its compile-time error detection is terrible. What this means is that a large number of errors in your programs will not be picked up until your program is run (usually resulting in your program crashing). Luckily, the VB IDE will provide you with some very useful information to help you find the error. The end result of all this is that you should ensure that you do your testing in the VB IDE. Do not attempt testing with a stand-alone executable.

NEXT ->


Matthew Roberts, Macquarie University 2002