Exercise 1 :: Welcome to Visual Basic

Welcome to Visual Basic. In this workshop we will learn simple programming techniques through the programming language Visual Basic (VB). Many of the concepts we will learn apply to all languages, but we will also be taking advantage of some of VB's special features to make our lives easier.

What type of language is VB?

VB is a language that takes advantage of the Windows environment to make programming simpler. Traditional programming languages (such as C, Pascal, Fortran) are procedural. This means that the program execution proceeds from the start to the end, line by line. The only way to break this, is to add code to deal with user options (eg. menus and buttons, etc.). Adding this by hand can be tedious and difficult, so VB does the work for you.

VB is an Event Oriented programming language. This means that the flow of program execution is based around events occuring within the program, or occuring to the program. For example, the following are events that you can program in VB,

Visual Basic also makes use of many object oriented principles. In particular, every "thing" in the VB universe is an object. We can get information from, and perform operations on objects. All objects in the VB universe have properties (pieces of information) and methods (things they are able to do) associated with them.

The three steps to creating a VB program

These are the steps required to program in Visual Basic. Programming is just one step in the software development cycle. We consider the other steps in our final programming project.

Step One

Create the user interface. In this step you define what the interface of the program will look like. This includes the windows, menus, and buttons that the user will interact with.

Step Two

Define the properties. All the elements of the user interface have special properties that define how they will behave.

Step Three

Write the events of the program. It is this step that actually involves writing code. Thus this is the most time consuming part of the process. Each of the interface elements has events defined and these combine to create the operation of the program.

The VB Integrated Development Environment (IDE)

Visual Basic is much more than just a programming language. All your programming in VB is done in the VB IDE. This is a powerful program that lets you design interfaces, navigate your project, start, stop and debug programs.

Task One :: Your first program

In this task, we will get to know the VB IDE

  1. Open the VB IDE (Start->Programs -> MS Visual Studio -> Visual Basic)
  2. You will presented with the following screen
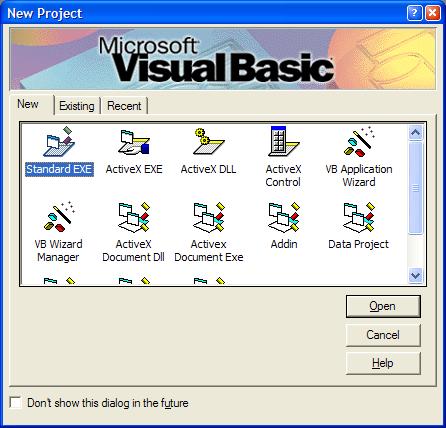
    the first choice

  3. We wish to create a "Standard EXE". This means we are creating a normal Windows program. Highlight "Standard EXE" and click "Open"
  4. You will be presented with the VB IDE for a simple program with a single form.
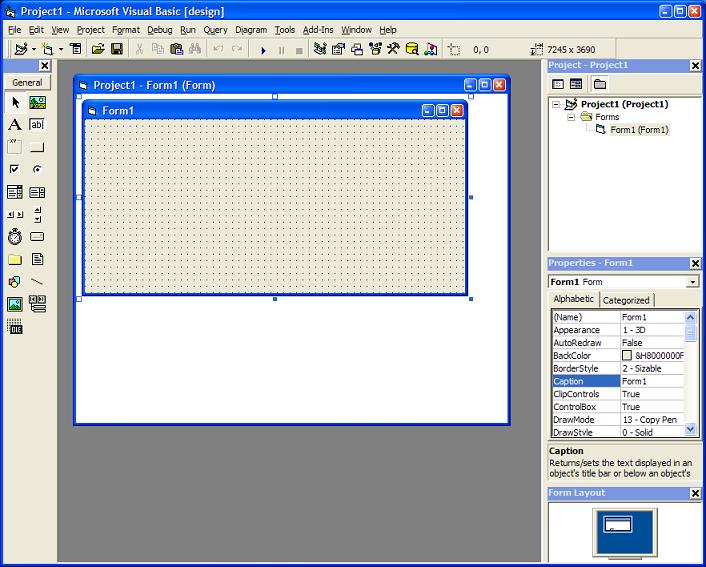
    simple project

  5. Press the run button

    run button

  6. Your first program should now run. This will result in the following program running on your computer.
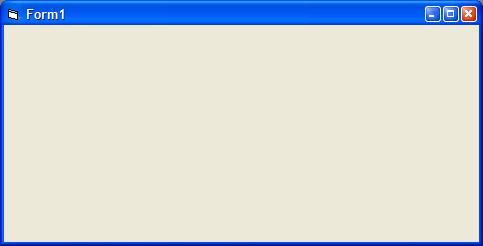
    first program

  7. This is the same as the initial form that you had in your VB IDE. Close this window (form) with the "x" in the top right corner and you should be returned to you project in the VB IDE.

Task Two :: Saving your project

In this task, we will save our first VB project.

VB organises your work into projects. Each project should correspond to one program that you are creating. When we started VB and chose "Standard EXE", the IDE automatically created a project for us. It has been give the default name of Project1. This project has had an empty form put in it and called Form1. When we save this project, VB will save one file for the project, one file for each of the forms and perhaps other files that we won't worry about at this stage. The best way to organise this is to keep each project in its own directory.

  1. Create a directory called "HelloWorld"
  2. Go to "File -> Save Project As" and save the project in this new directory with the name "HelloWorld". You will need to name the form and the project. Name them both HelloWorld.
  3. Go to Windows Explorer (Programs -> Accessories -> Windows Explorer) and navigate to your "HelloWorld" directory and you should see the following files.
    • HelloWorld.frm (this is the form)
    • HelloWorld.vbp (this is the project)
  4. You can open your project from here by double clicking on the "HelloWorld.vbp" icon.

NEXT ->


Matthew Roberts, Macquarie University 2002