Exercise 6 : Controls and Control Structures
Programming (in all languages, not just in VB) makes strong use of control structures. These are methods by which we can easily and methodically control the flow of instructions in our computer programs. We have already seen one control structure, the If statement. In this exercise we discover the loops available in Visual Basic. We will also discover arrays. Along the way we will discover how to add more complex user interfaces and more complicated programs. We will begin using menus and dialog boxes. At the end of the next few exercises, we will have developed a text editor very similar to Notepad (a program that comes free with Windows).
Programming concepts
Control Structures - Loops
We have already seen if statements. These allow us to choose between two different blocks of code, only one of which will be executed. Now we look at loops. Loops allow the same piece of code to be repeated a certain number of times. The most common loop in VB is the for loop.
For "variable ="start" To "end"
	"Do something"
Next
As an example you could try the following code somewhere. It will put 10 message boxes on the screen, one after the other, each displaying one of the numbers 0 to 10.
For i = 1 To 10
	MsgBox(Str(i))
Next
There are two other forms of loops in Visual Basic. The two are basically equivalent, which you use depends entirely on which is more convenient.
Do while loops
Here is a do while loop that does exactly he same thing as the above for loop. Notice that you need to keep a "counter" variable (i) and the counter has to be manually incremented. All the capitalised words are the keywords that make up a do while loop.
i = 0
Do While i <= 10
    MsgBox (Str(i))
    i = i + 1
Loop
Do until loops
These are almost identical to the do while loop except that the condition defines when to stop instead of when to keep going.
i = 0
Do Until i > 10
    MsgBox (Str(i))
    i = i + 1
Loop
Arrays
Arrays are a method by which we can store a simple "list" as a variable. An example is an array of integers, each representing a number of calories in a day. Imagine a person who wants to keep track of their calorie intake over 100 days. It would be difficult to use 100 different integer variables, rather we would use an array. The following is a declaration of an array of 100 integers.
Dim calories(1 To 10) As Integer
Arrays can be static (like that above) or dynamic. Static arrays cannot change size. In the above example, the calories array can never hold more than 100 numbers. Dynamic arrays can change size if we require them to get larger. To declare a dynamic array, simply leave out the information on its size.
Dim calories() As Integer
We use the Redim statement to set/re-set the size of a dynamic array.
There are two ways to access the elements in an array. You can either access one directly, or you can access them all in sequence with a "For Each" loop. To access one element individually, simply write the name of the array followed by the index you are interested in in brackets. The following code segment will set the 10th entry to 9.
calories(10) = 9
The For Each loop is a control structure that allows us to access each element in order. The following code segment will set each element of an array to 10.
For Each i In calories
	i = 10
Next
User interface concepts
Menus
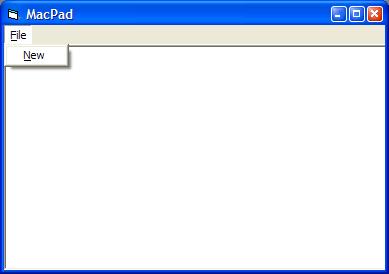
Menus are the lists of commands available immediately below the title bar.

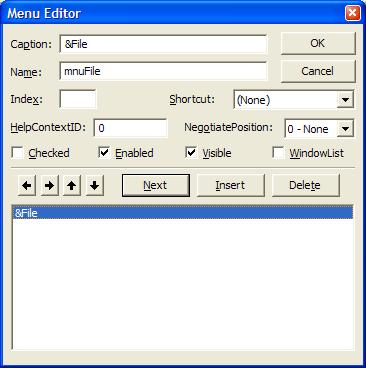
When you have a large number of options to present to the user, menus are the best mechanism by which to do it. It is very easy to add menus to a VB project. In fact, VB has automatically included one, but it is empty and invisible until you put something in it.
Dialog Boxes
Dialog boxes are simple forms. They are often used as a quick interlude that asks for information from the user. The Windows that are used for opening and saving files in most Windows programs are great examples of dialog boxes. To create a dialog box for your project, you need to add a new form to it. Up to this stage we have been dealing with one form programs, once you start using dialogs you will be dealing with multi-form programs. The techniques that apply to dialogs apply equally well to any situation where multiple forms are required.
The typical way things run when a dialog is required is:
- Load and Show the dialog.
- The user interacts, perhaps changing some settings.
- The dialog performs the steps that correspond to the user changes.
- The dialog is hidden and unloaded.
In this exercise we will add dialogs to a project and learn how to have them effect other forms.
Further VB
We have already seen the object model in VB in action. We have seen how to access the members of an object with object.member. In VB, forms are also objects, and we can access the controls on that form in a similar manner. Here is the method by which you could access a control on a form:
form!control.member
Notice that we use an exclamation mark instead of a period to access the controls of a form.
Modules
We have seen that VB code is organised into procedures. These procedures are also organised into modules. A module is like a "page" of VB procedures and each module has its own global declarations that exist across that module. Although we weren't aware of it, we have actually been using modules all this time.
Every form has a module associated with it, when we look at the code editor, we are actually editing the module for that form. This is important now because once we have more than one form, we will have more than one module.
Option Explicit
In VB, it is not necessary to declare the type of each variable that you use. However, it is a really good idea to do so. If you type;
Option Explicit
as the very first line in any module of code, VB will force you to declare the type of any variables you use. It is highly recommended that you do this.
Text Editor
In the following sequence of tasks, we create a simple text editor. If you wish to get a sneak peak at the finished product, you can run this program (to run the program, hit the link and then choose "Open"). We will slowly build up this program in a number of steps.
NEXT ->
Matthew Roberts, Macquarie University 2002